Taming the Wild Yeast (continued)
Introduction | Journal | Tips | Wisdom | Learn more
My Sourdough Journal
Wherein are recounted the trials and tribulations of trapping Candida milleri, the magic of baking bread, and the occasional vocabulary word.
Day 1 - January 18, 2001
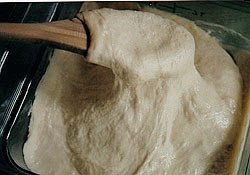
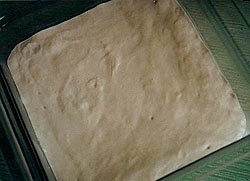
Following Ed Wood's instructions, I mixed together 2 cups bread flour (Pillsbury, in case you're wondering) and 1 1/2 cups warm water. After whipping up the soft dough with a wooden spoon, until it was aerated and satiny smooth, I scraped it into a 2-quart Cambro container (as in heavy plastic). A double layer of cheesecloth and a Chronicle rubber band completed my wild yeast trap. I just wanted to catch the microbes, not any wandering critters of the six-legged variety. After a short debate with myself about the benefit of setting the proto-starter inside or outside, I decided to live dangerously and put it out on the fire escape, wedged between my rosemary and chive plants. I'm sure there're plenty of microbes floating around the apartment, but I figured I might as well try for the wilder stuff.
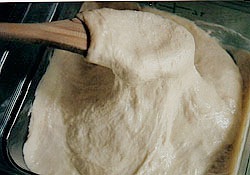
Initial flour and water mixture.
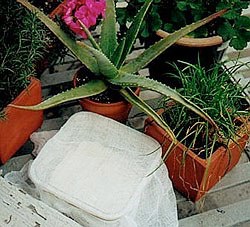
The trap is laid
Day 3 - January 20
Nothing yet but a lost ant. Switched to three layers of cheesecloth.
Day 5 - January 22
I've been checking again, twice, three times, okay maybe four times a day. Stir it occasionally. This may not be as easy as I thought. A little fuzzy white stuff appeared on one corner, but I just flicked it off. Wrong visitor.
Day 6 - January 23
Raining, raining….Rescued the starter from the fire escape and found a place for it on the bedroom dresser, away from all the new year activity in the kitchen. Still no action. I guess it's a good thing that I ordered back-ups.
Day 7 - January 24 (my birthday and the new Year of the Snake)
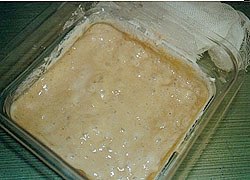
Bubbles!!! A few big ones just beginning to rise, here and there. I stirred in 1 cup each of flour and water to help feed the newly domesticated microbes. Hope is restored.
Coincidentally, the dehydrated starters from Sourdough International arrived: Original San Francisco (I guess I'll have two), Egypt (maybe descended from the yeast in the world's first loaves of bread!), and France. As soon as I dig up some quart jars, I'm going to revive them. For now, though, they'll go in the fridge.
The very first bubbles popping.
Day 8 - January 25
Woke up and checked the starter. There's a whole layer of bubbles covering it, almost an inch thick. Stirred in another cup of flour and water, beating in more air to help the yeast breathe more easily. Maybe I'll make it to the hardware store for some clay tiles to line the oven. Mmmmm….fresh bread.
Foam appears within hours of each feeding.
Day 9 - January 26
Since the first bubbles appeared, I've been stirring in a cup each of water and flour every 12 hours. The bubbles are rising fast and furious now, smaller but more of them. Yesterday, the starter was beginning to smell like wet yeast, and by the end of the day, a very thin layer of clearish liquid was forming on its surface. I suspect this is the "hooch," or one of the byproducts of the life teeming in the starter. (Another is carbon dioxide—or what gives bread its rise.) Some bakers prefer to pour the hooch off, believing that increasing alcohol levels will eventually hurt the yeast, but most others, including Wood, like to stir it back in. Since I consider him an expert and since I'm never averse to extra flavor, I plan to do the same.
This morning, I sniffed the starter again as I stirred—and caught that distinctive San Francisco sourdough smell. I think it's time to celebrate!
More bubbles visible through hootch.
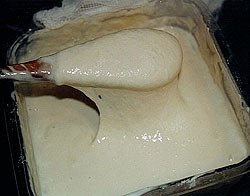
After vigorous stirring. Note bubbles still rising.
Day 11 - January 28
The starter has outgrown its container, but I haven't tracked down any big jars yet. With all the feeding and growing and holiday distraction, the starter now completely fills two 2-quart containers. Bread-baking needs to happen soon. One container goes into the fridge to enter dormancy.
With the other I begin making bread…
Preparing the culture: I activated the starter as usual with 1 cup flour and flour, but this time I let it stand for only 2 hours. Still, the light and airy layer of bubbles rose almost 3 inches. Monster yeast.
For the first proof: I measured 4 cups of this active starter into a stainless steel bowl and stirred in 4 cups of water until smooth. I then mixed in 6 cups of flour. (I'm planning on making 4 loaves of bread.) A loose drape of plastic wrap over the bowl will help keep the starter moist. The bowl goes into my oven, unheated but slightly warm from the pilot light. I'll leave it to proof overnight for 12 hours. This is the "sponge," or a soft, wet dough that is allowed to rise slowly before more flour and water are added to form the final dough. This extra proofing time creates a bread with a deeper flavor and denser texture.
By the way, "proof" can refer to 1) the short test of activating yeast (e.g. letting dormant yeast sit in bowl of warm water until foamy to make sure it's alive and well), or 2) the long process of fermentation, that is, the magical period during which yeast eats flour and communes with Lactobacillus to make a delicious, full-bodied dough. Of course, I'm using it here in the latter sense.
Day 12 - January 29
Morning
Have you seen the bread-baking episode of I love Lucy?
The very foamy sponge has outgrown its bowl, dripping all over the oven floor. A good excuse to clean the oven, I suppose. Luckily, the sponge still smells fresh—no beery fumes of over-fermentation.
Two of the four loaves are whole wheat. I'm following Wood's basic recipe for French bread.
Since I plan to give the ol' KitchenAid the honor of kneading, I had tracked down some King Arthur bread flour, a special grind for machines. The extra gluten will safeguard against overworking the dough. It's nearly impossible to break down wheat gluten proteins with hand-kneading, so if you're planning to make bread completely by hand, you won't need to worry about this.
Yes, most bakers extol the higher cosmic alignment attained through the soothing, repetitive motions of folding bread dough. A few minutes of direct hand-to-bread contact at the end of kneading, just to finish the dough to silky smoothness, is perfectly enough for me.
But I hadn't counted on just how stiff sourdough can be. My professional model KitchenAid, fancy millennium bowl and all, started smoking. Worried, since I hadn't forked over the extra $100 for the reset button, I stayed close to the machine and let it rest occasionally. It took almost fifteen minutes on lowest of low speeds before the dough passed the kneading tests.
Two oiled bowls, two big balls of kneaded dough, some plastic wrap, a very clean oven…and six more hours to let the dough ferment (or "rise") again.
Night
I ended up forming five loaves: three round boules of whole wheat and two oval batards of white.
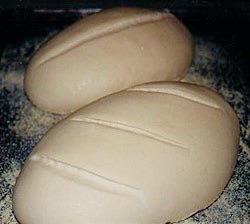
Baby-soft batards just before baking.
The clay tiles never materialized. But there are a couple of other tricks for obtaining a sturdy, crisp crust (see next page).
Twenty minutes later, I pulled the bread from the sheets and returned them to directly to the oven racks to finish baking. About five more minutes, then they went onto cooling racks. I couldn't resist a quick snack—the still steaming heel end of one of the batards. It's a victory feast, of sorts, to enjoy the benefits of yeast.
The bread's texture continues developing as it cools, from the attractive crinkling of its crust (you'll hear the tic-tic of the outer crust crackling!) to the complete moisture migration required for an even, springy crumb. Like cookies and roasted meat, bread needs a period of resting.
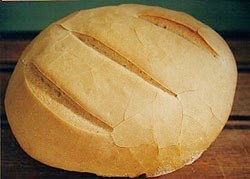
A still-warm loaf just before we ate it.
The loaves weren't perfect—I definitely learned some lessons from this first baking. But with a couple of containers of sourdough starter in the refrigerator and a rainy winter ahead, I have many more loaves of bread to bake.
February 2001
© Thy Tran